Blog
Understand the basics
The Blog component allows administrators to post news about a participatory space, which participants can read to get updates.
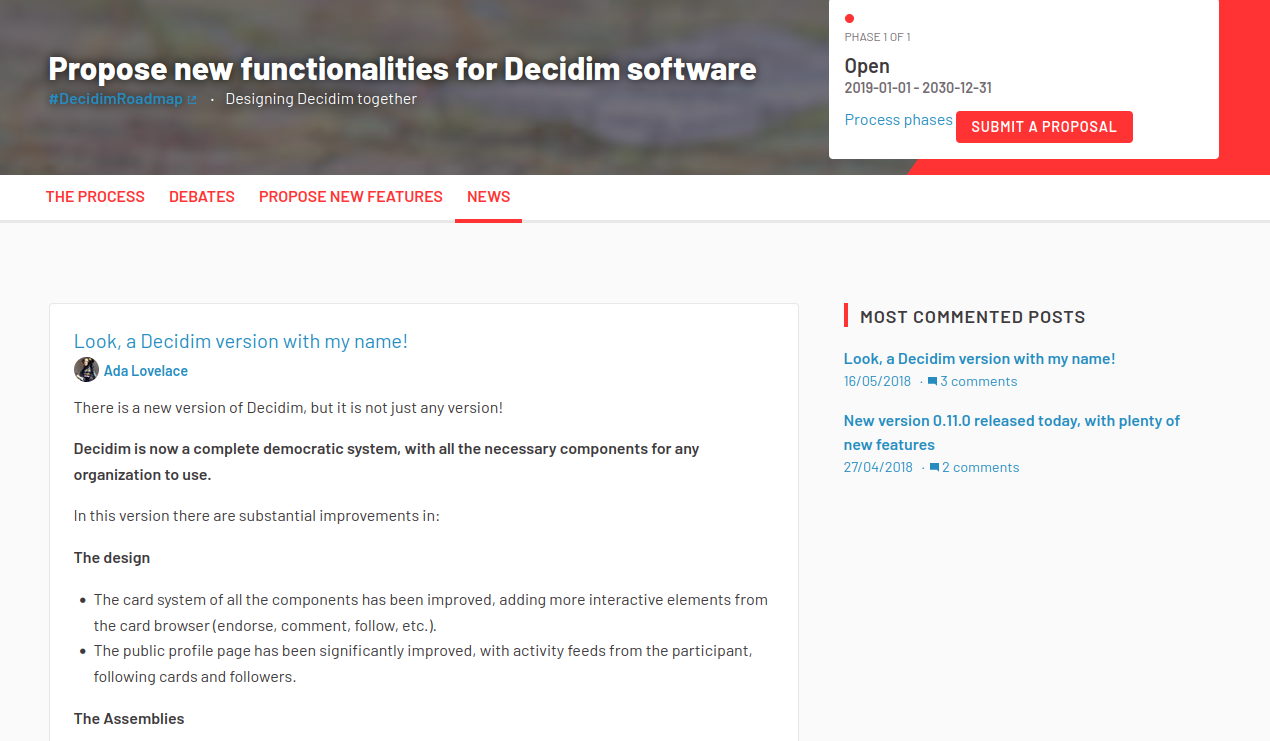
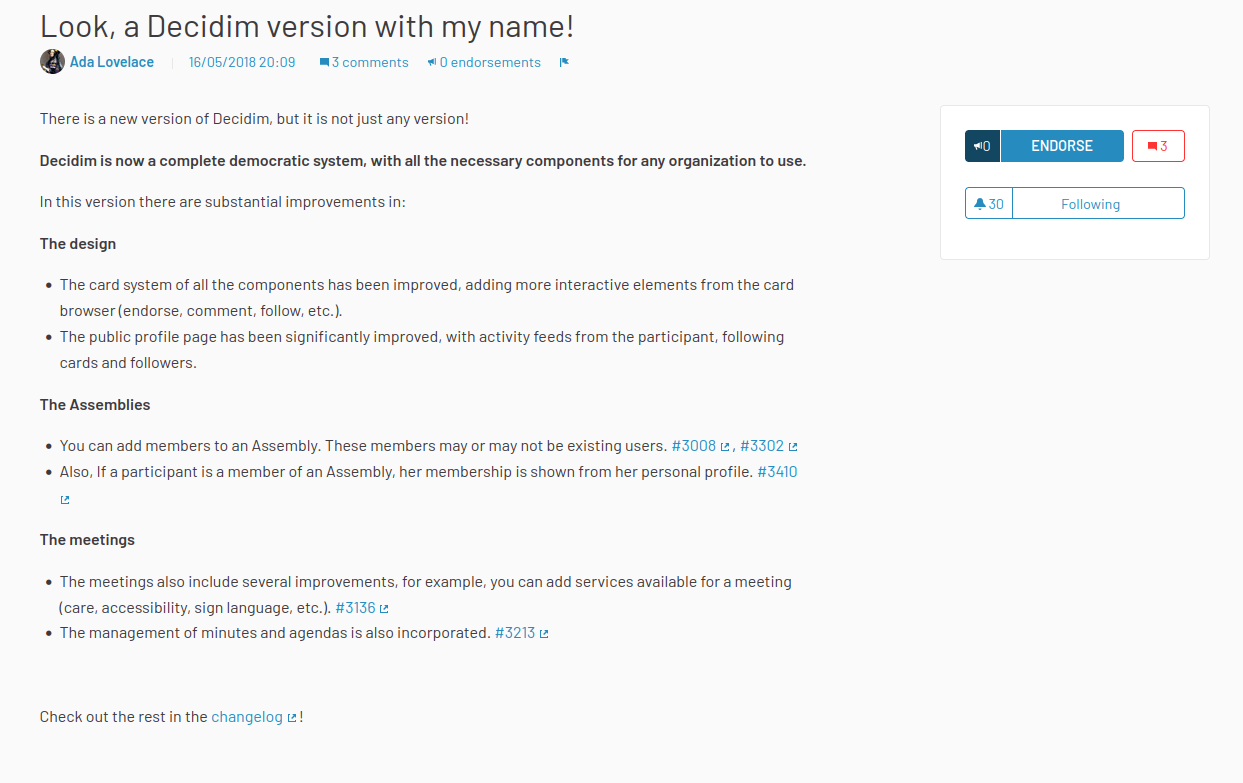
All blog posts are available on the post list, and participants can click each blog post to learn more about what’s new.
Configuration
Create a blog component
To create a Blog component, first go in the participatory space where you want to create it.
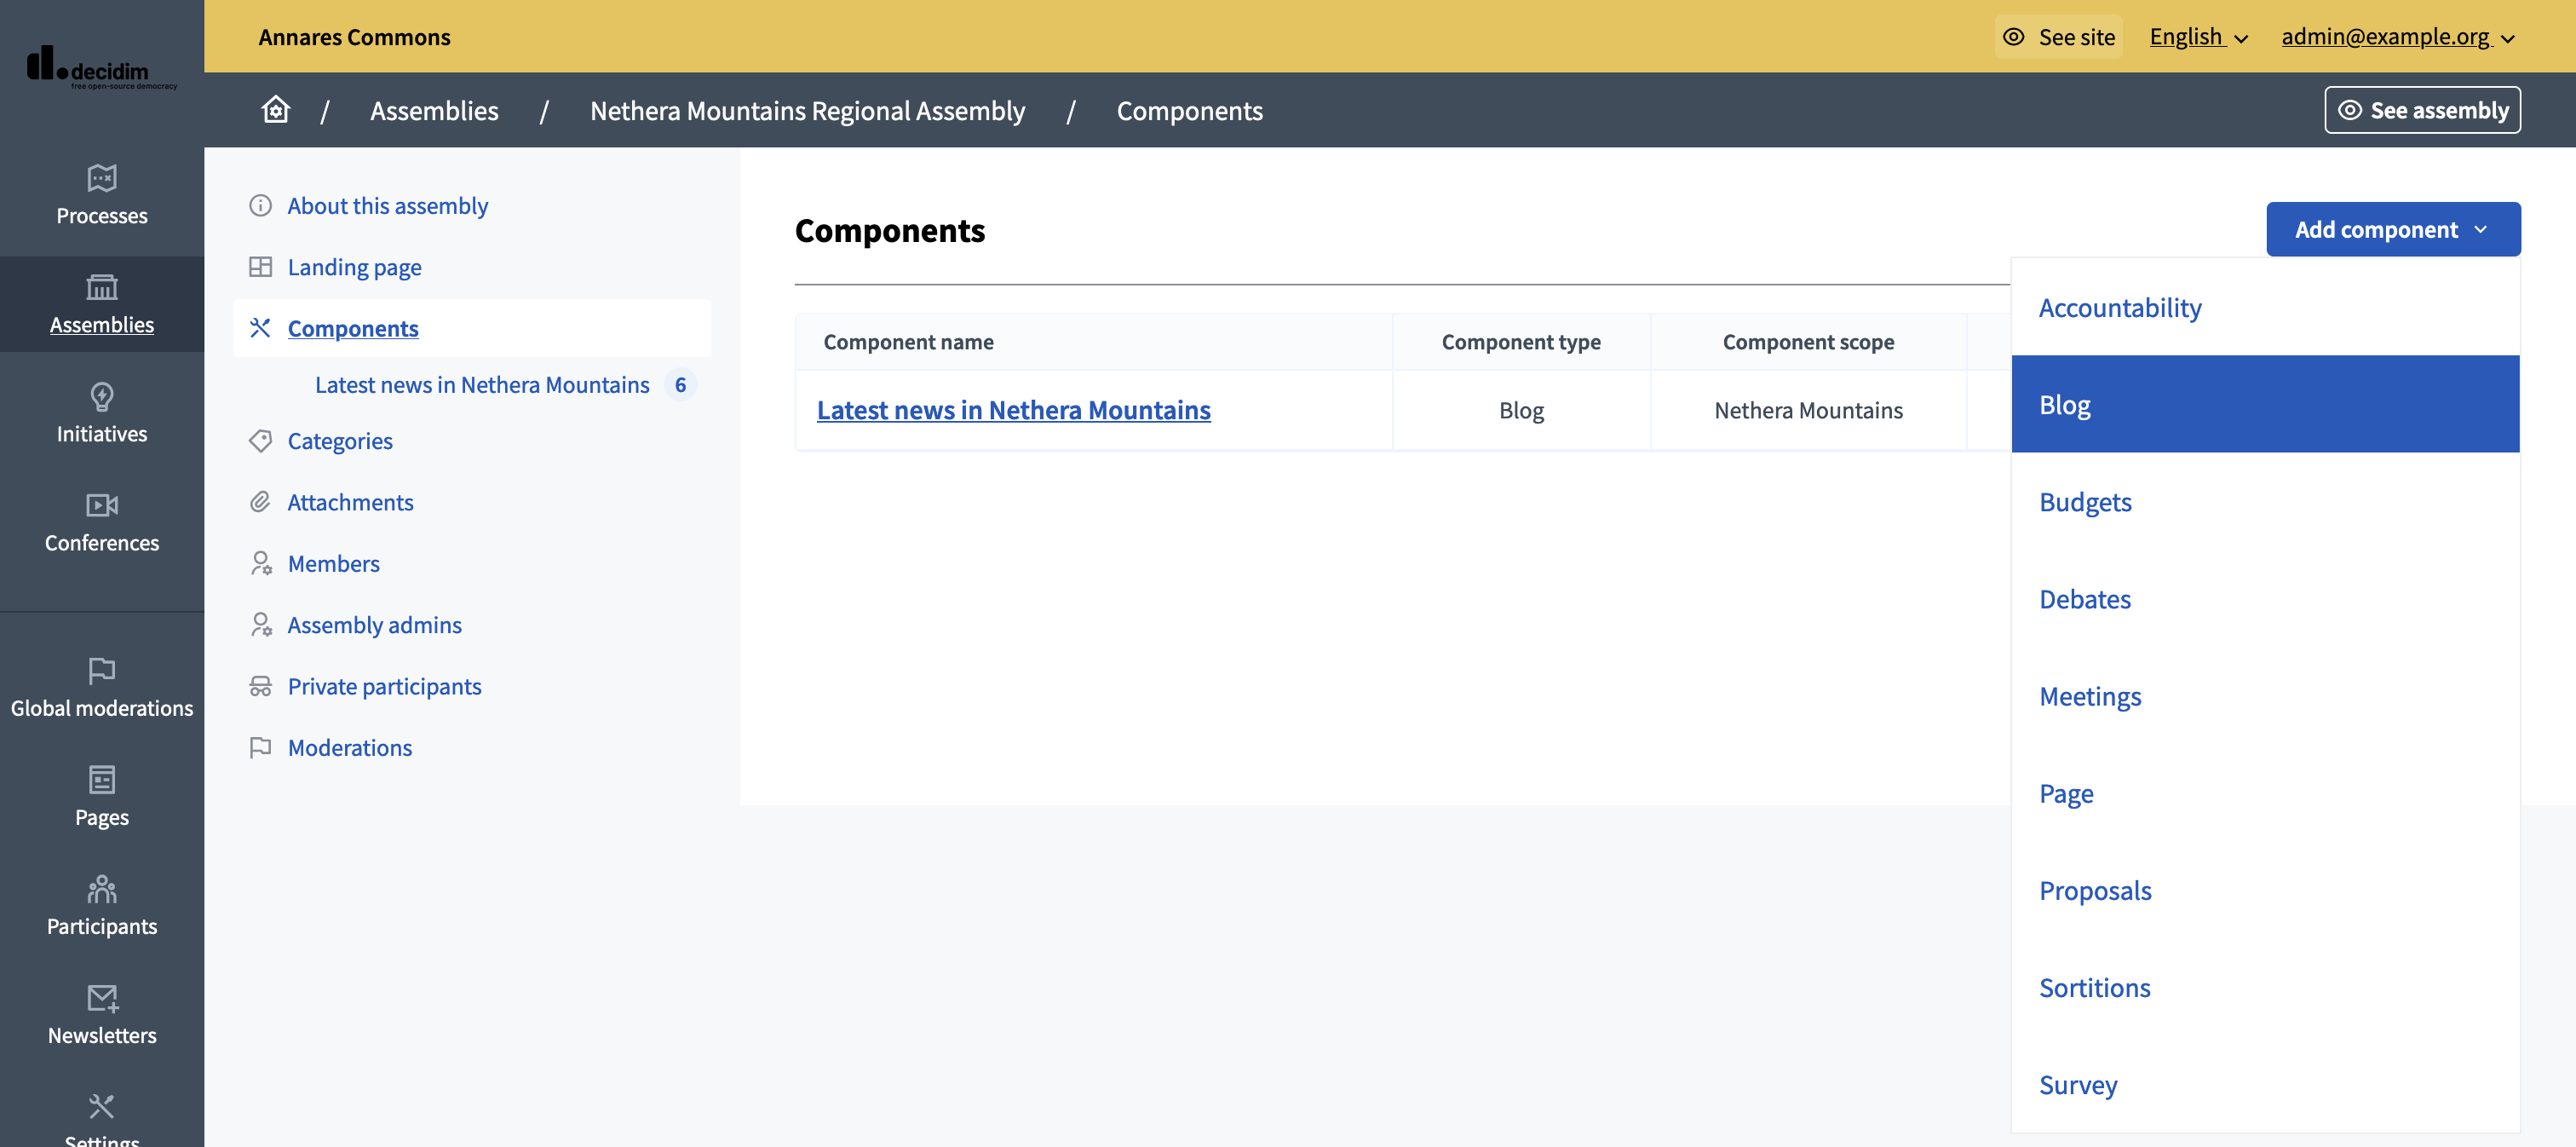
Then:
-
Click on the "Components" item in the secondary menu
-
Click the "Add component" button
-
Select "Blog"
-
Fill the component creation form
You can still update this form and the configuration after creating the component, by clicking the
![]() icon on the components list.
icon on the components list.

| Field | Type | Description |
|---|---|---|
Name |
Required |
The title of this component. For instance, "Blogs" or "Latest news" |
Order position |
Optional |
Which order it has in relation to the other components. Having a lower number means a higher priority. |
| Field | Type | Description |
|---|---|---|
Announcement |
Optional |
A general announcement visible on the Blog component landing page. |
Comments enabled |
Optional |
If you want participants to be able to comment on the blog posts. |
Comments max length |
Optional |
The characters limit that participants have when making comments. Leave 0 for default value. |
| Field | Type | Description |
|---|---|---|
Announcement |
Optional |
A general announcement that will be visible on the general blog landing page. |
Comments blocked |
Optional |
Whether you want to enable comments creation for this phase. |
Endorsements enabled |
Optional |
Whether you want to enable endorsements for this phase. |
Endorsements blocked |
Optional |
Whether you want to enable adding new endorsements for this phase. |
Manage posts
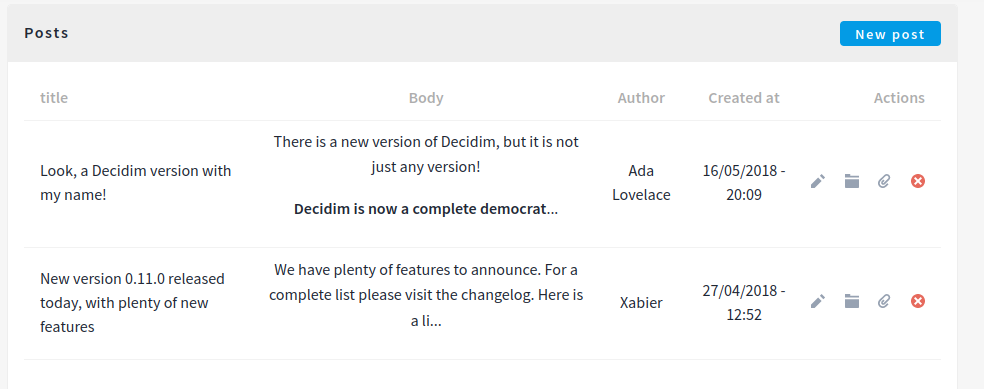
To start creating and managing posts, click on the component title in the navigation bar or on the component list, or click on the
![]() icon on the components list.
icon on the components list.
Create a post
To create a post, click the "New post" button on the top right of the page.
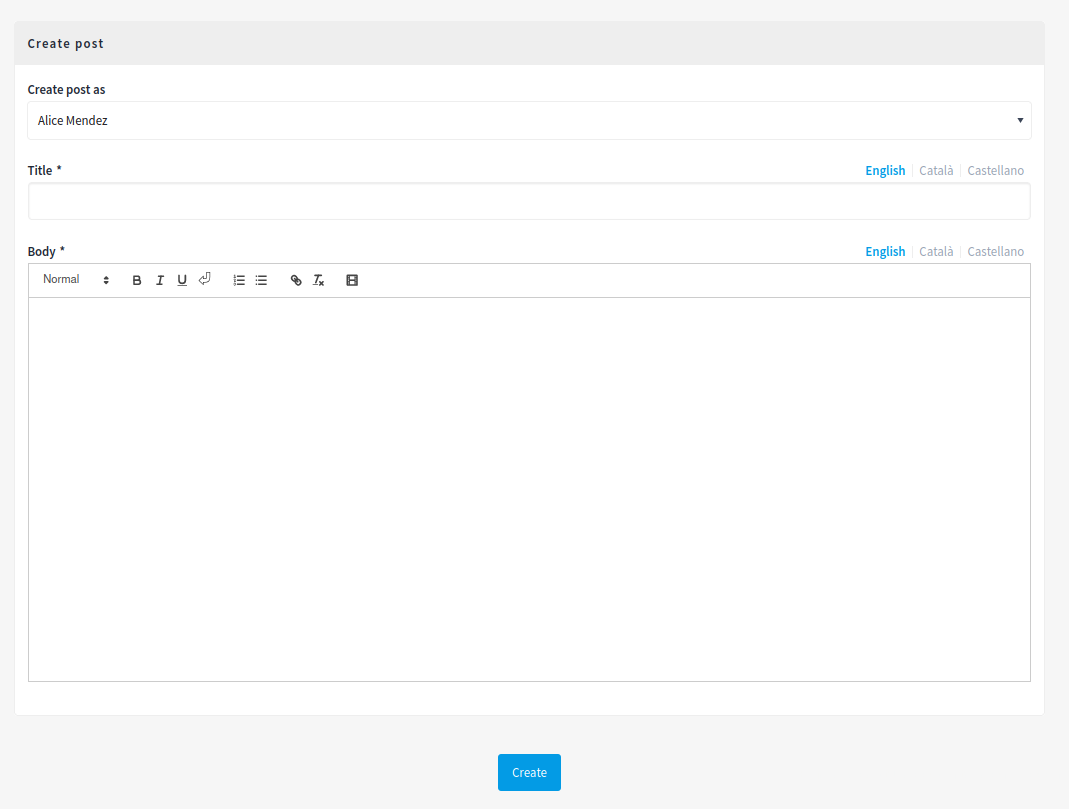
| Field | Type | Description |
|---|---|---|
Author |
Required |
Participant account or user group authoring the post. |
Title |
Required |
What is the title of this post. |
Body |
Required |
What is the description of this post. |
Publish time |
Optional |
Publication date for the post. If in the future, the post is not published until this date. |
Actions
| Icon | Name | Definition |
|---|---|---|
|
Edit |
Edit this post. |
|
Folder |
For classifying attachments. |
|
Attachments |
Add documents related to the post. |
|
Preview |
See how it’s shown in the frontend to participants. |
|
Permissions |
Handle the authorizations needed to comment or endorse this specific blog post. |
|
Delete |
Delete this post. |