Identity documents authorization
Understand the basics
This authorization allows a participant to upload its identity documents into the platform, and get their account verified. These documents depend on the organization, they could be a driver’s license, a passport, a national identity card, a club membership card, etc.
| If you don’t want to collect any data, you should turn it off in the System panel. |
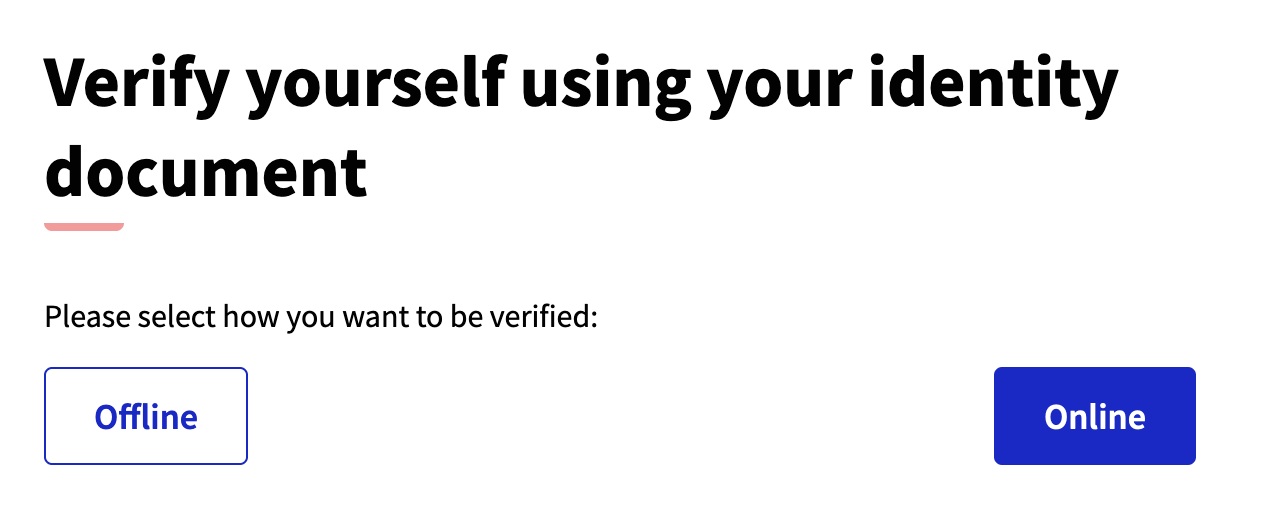
These documents are reviewed by an administrator who can accept or reject them. It’s possible to do this process in two ways:
-
Online: the participant is asked to upload the documents, and the administrator reviews these documents.
-
Offline: the participant is asked to fill in some data, and then they need to go to a physical place to show their documents face to face.
Configuration
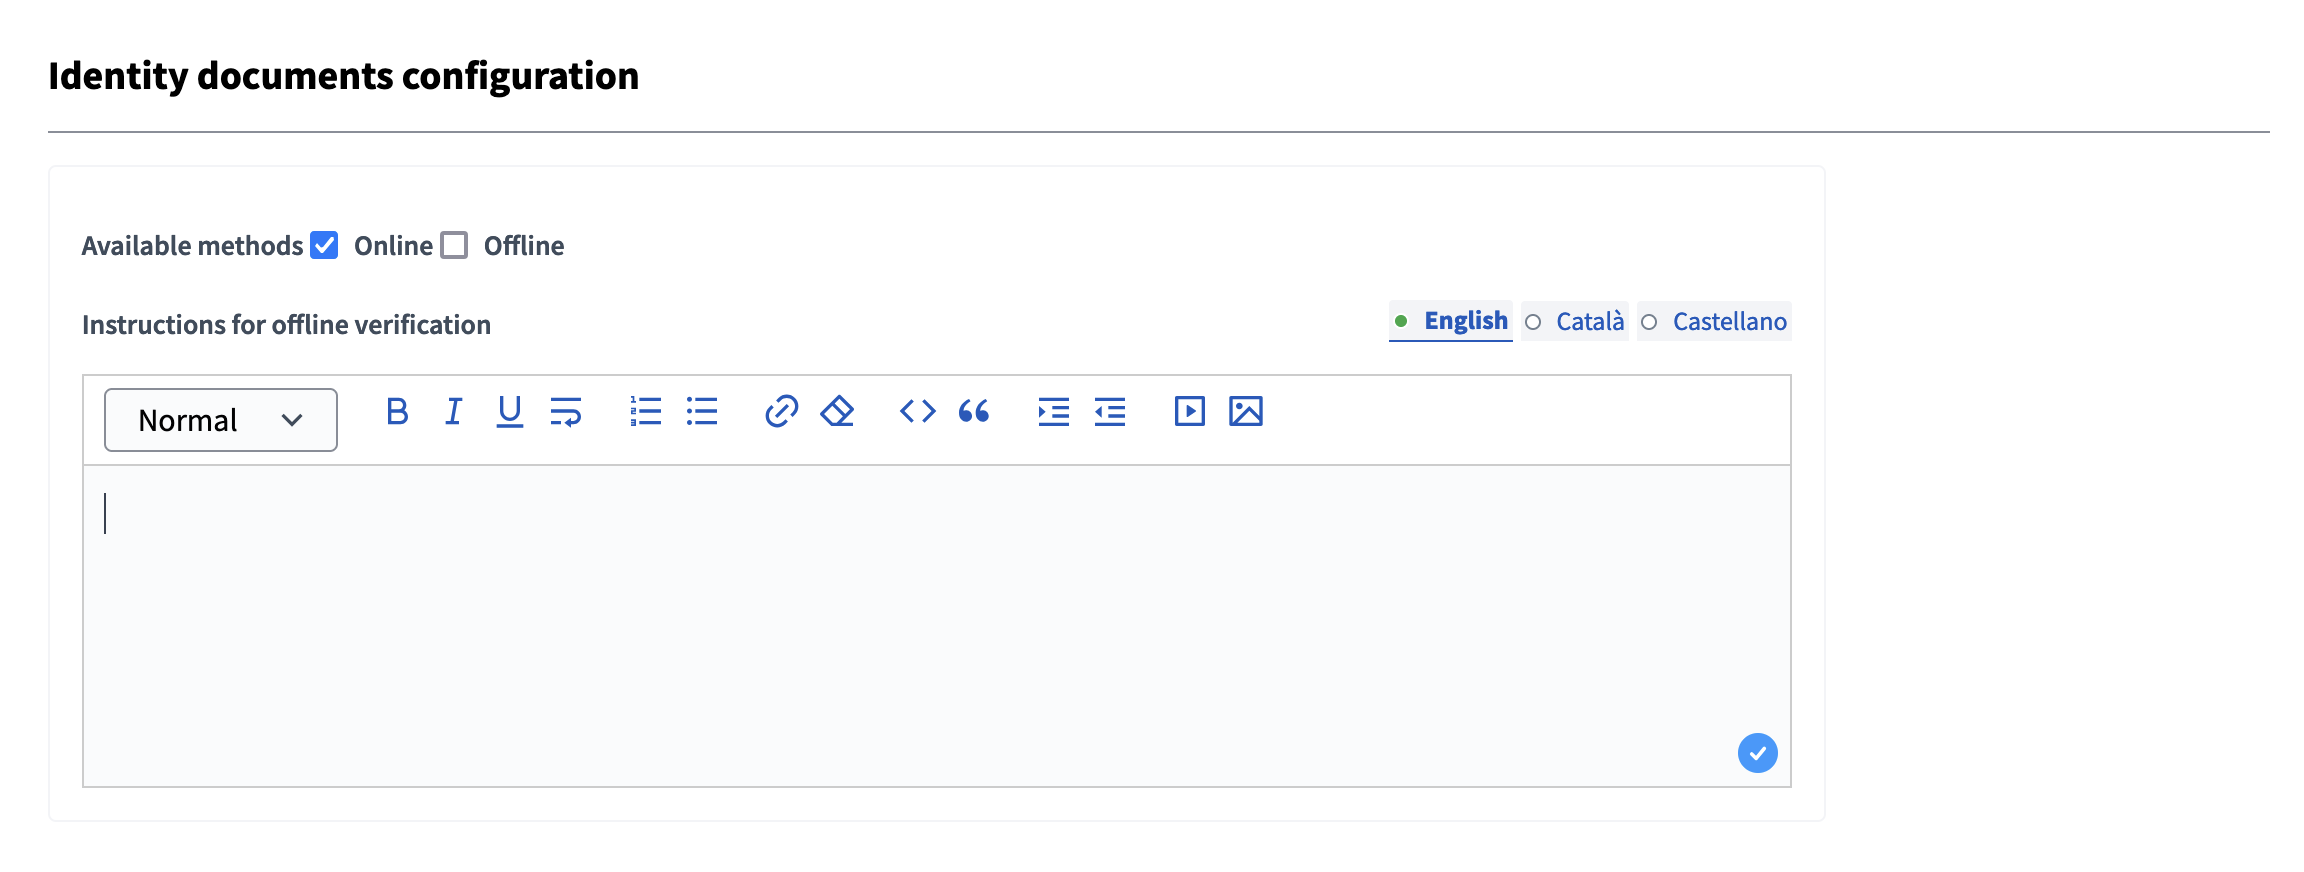
Click the "Config" button to configure the authorization.
| Field | Type | Description |
|---|---|---|
Available methods |
Required |
At least one method must be selected. Options: Online and/or Offline. |
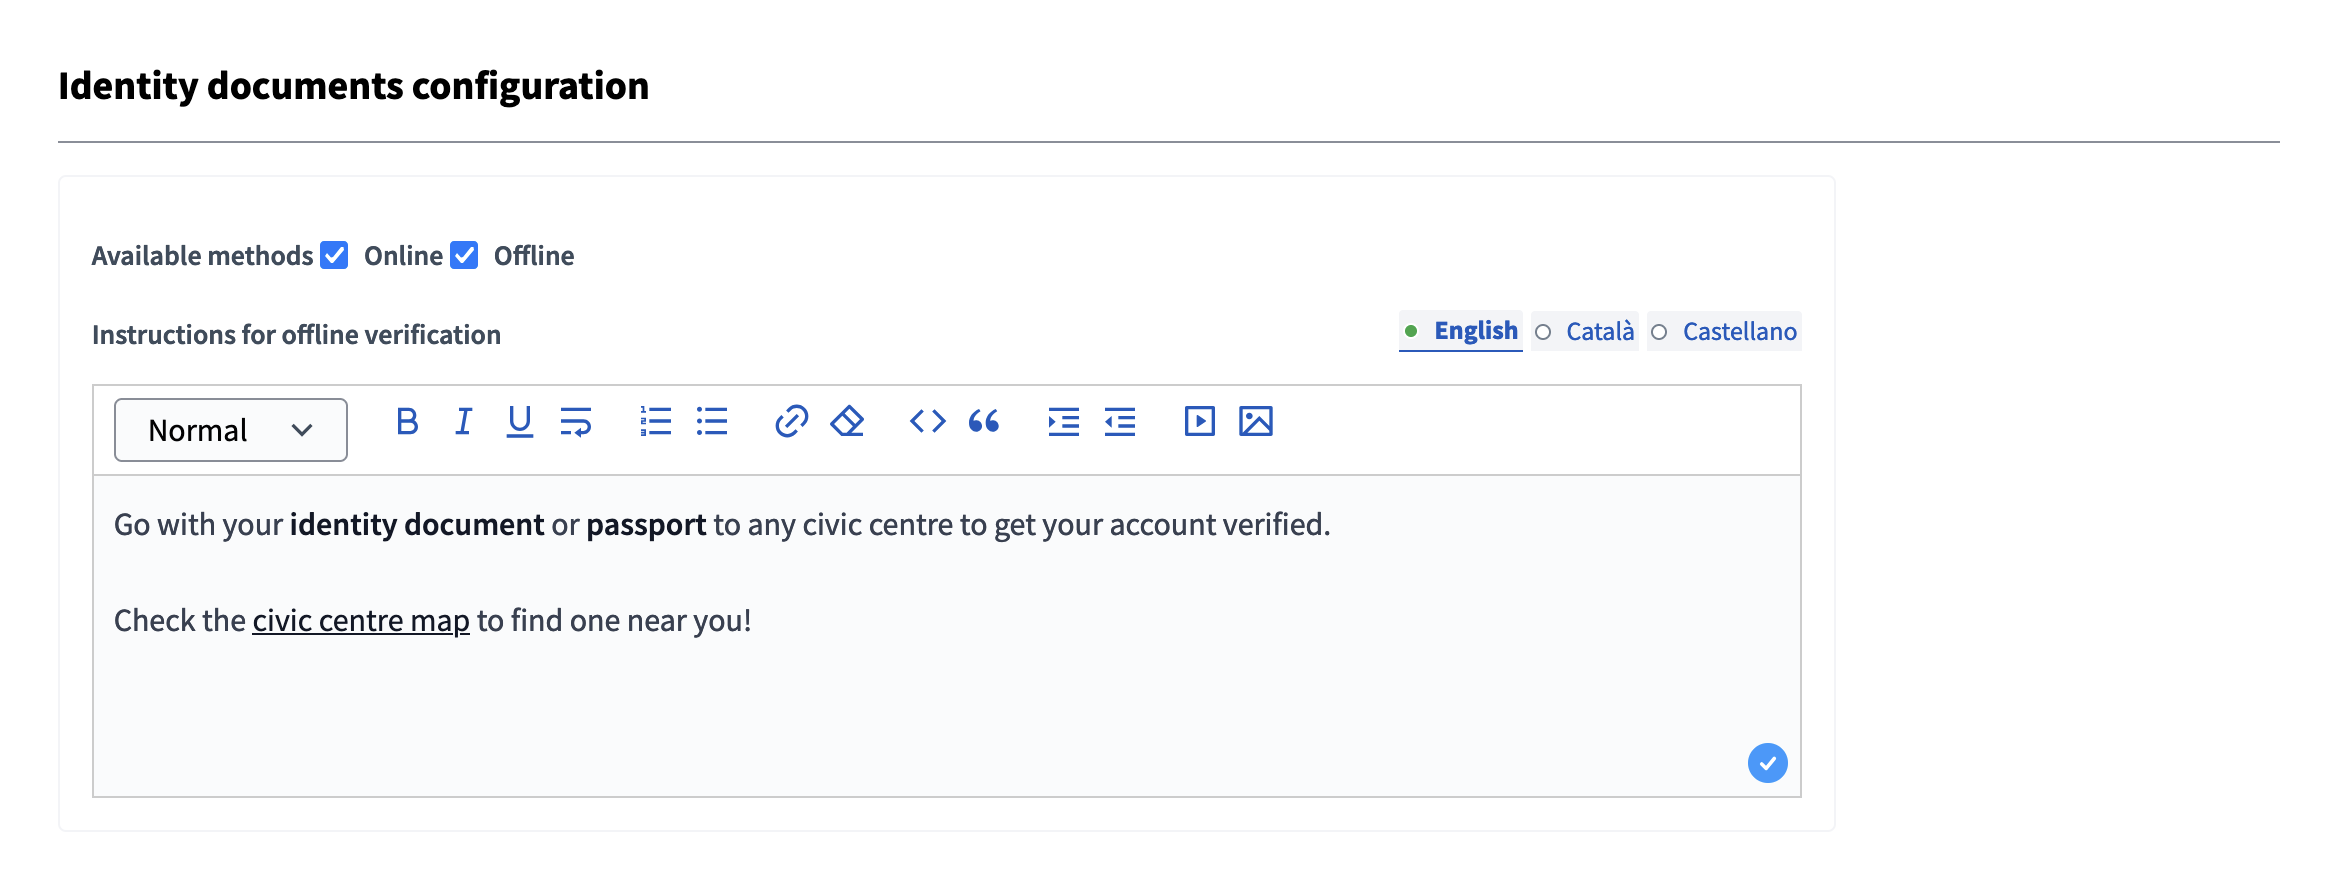
Instructions for offline verification |
Required (if offline is selected) |
Directions that participants need to follow to verify their documents when offline verification is selected. For instance, do they need to go to a specific place to show their documents? Is this place open some days of the week? Is it open for certain hours? |
Online verification
The process is:
-
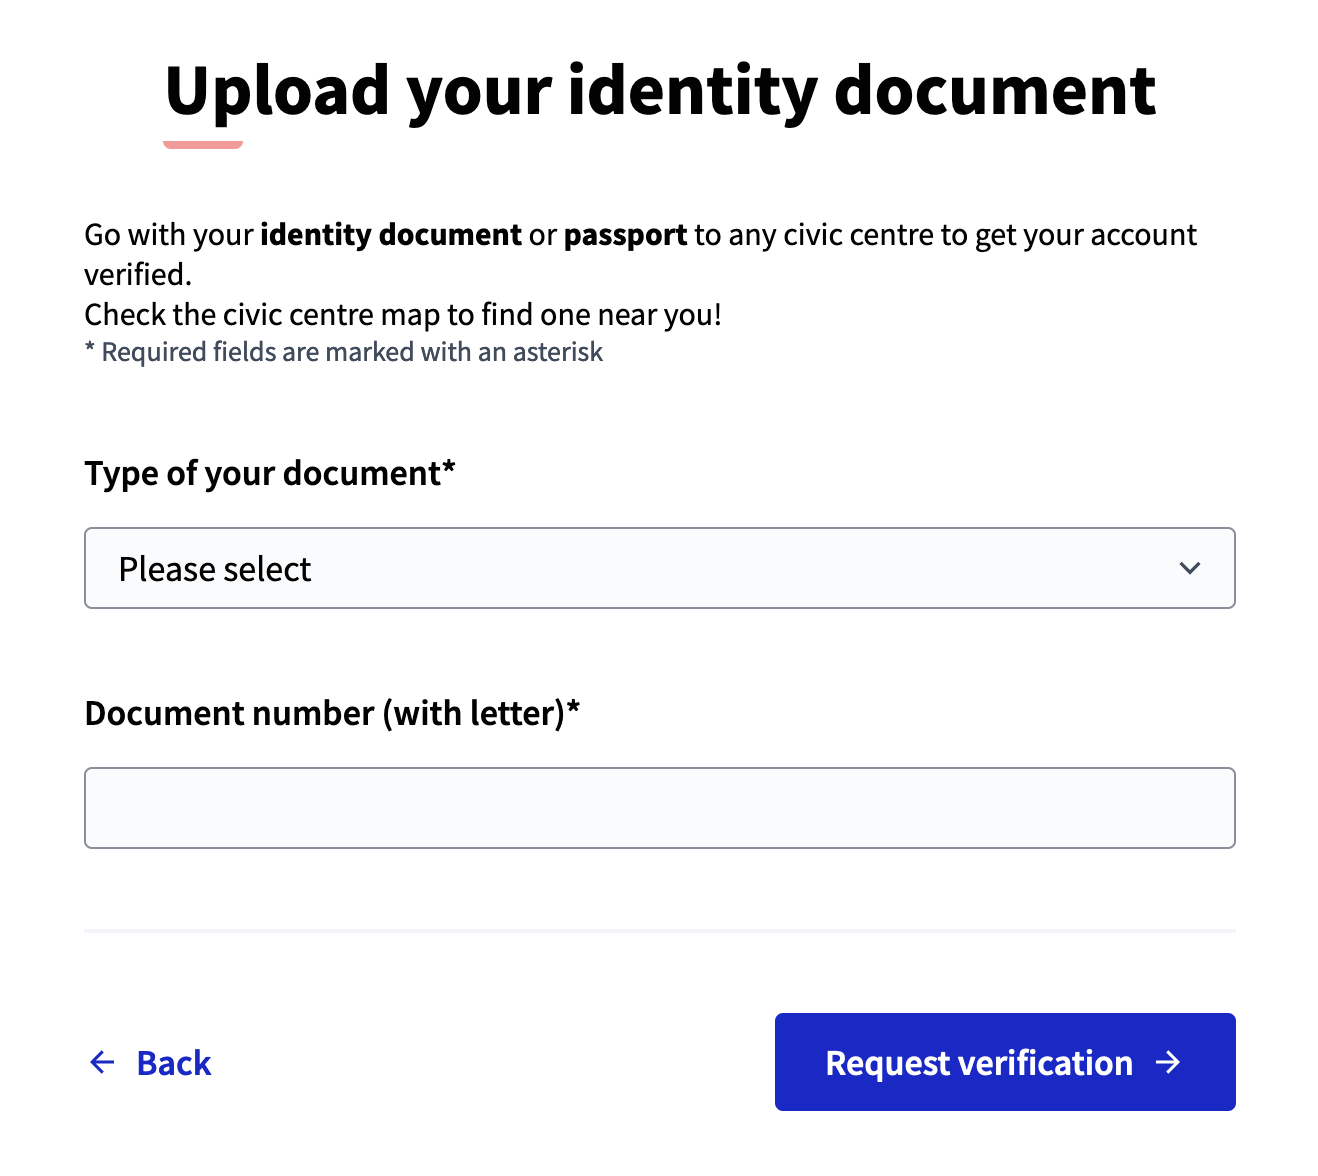
Participants fill in their document type and number and upload a copy of their document.
-
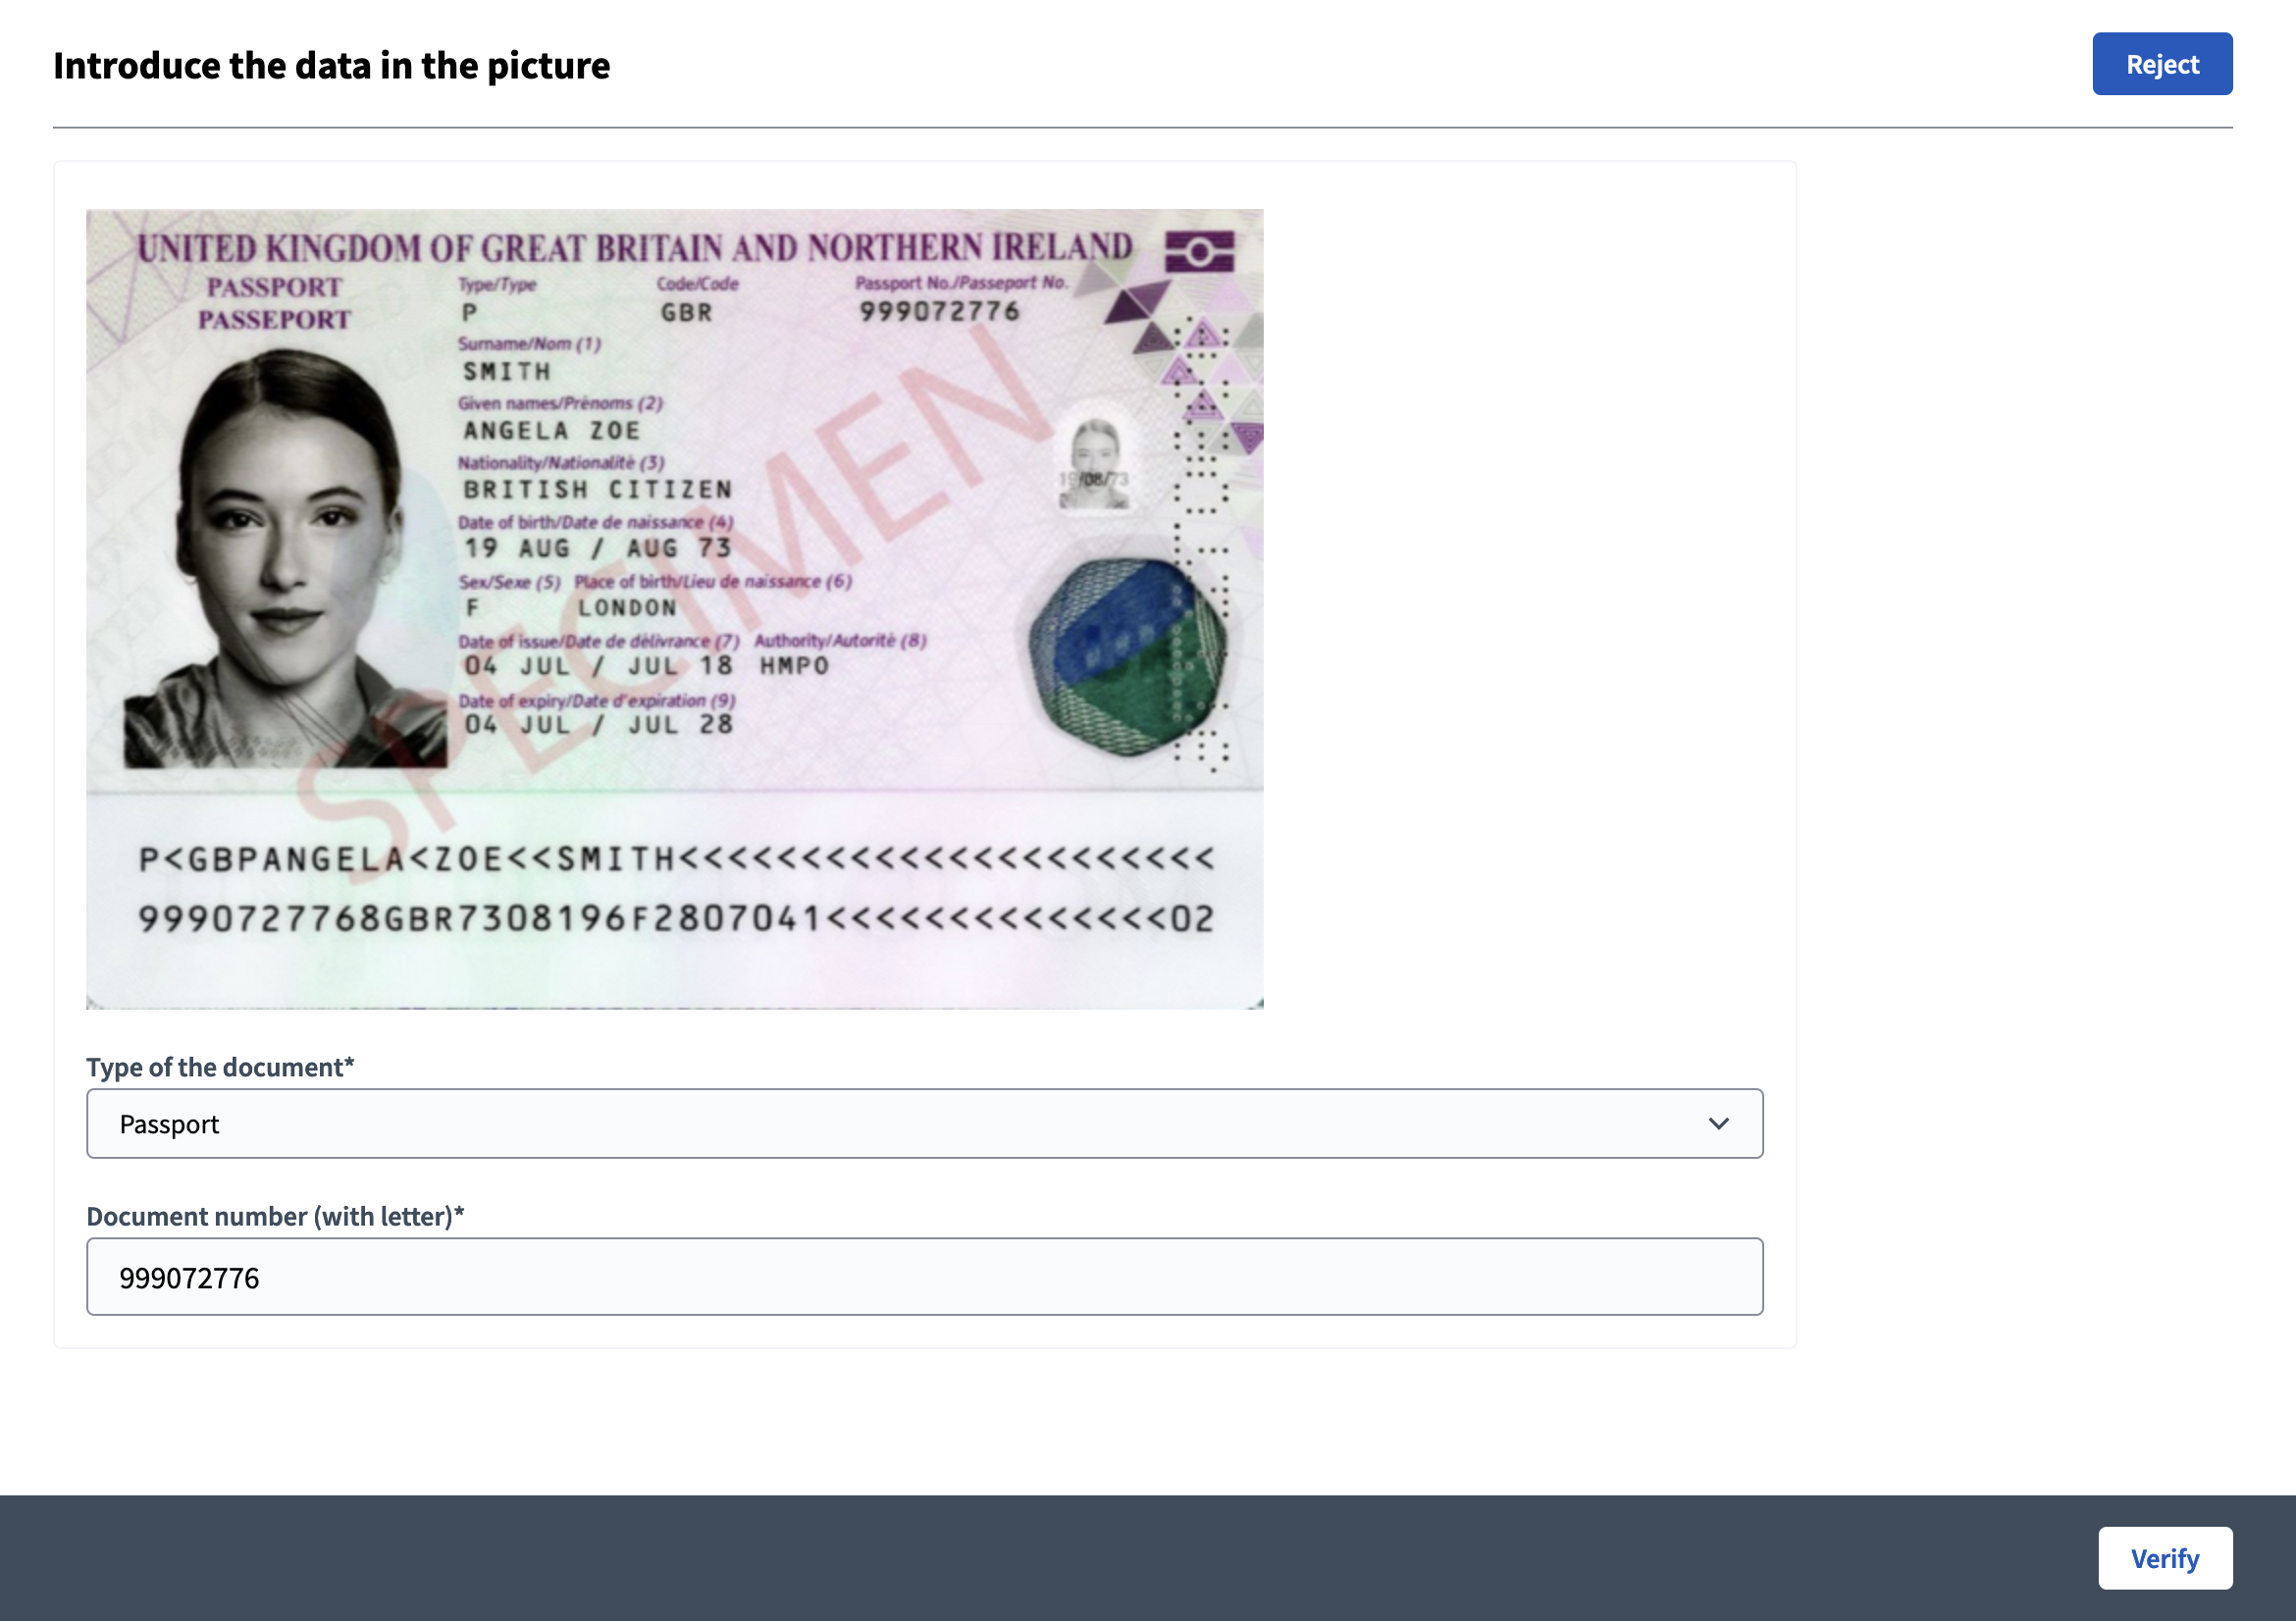
An administrator fills in the information present in the uploaded image.
-
The information should match whatever the user filled in.
-
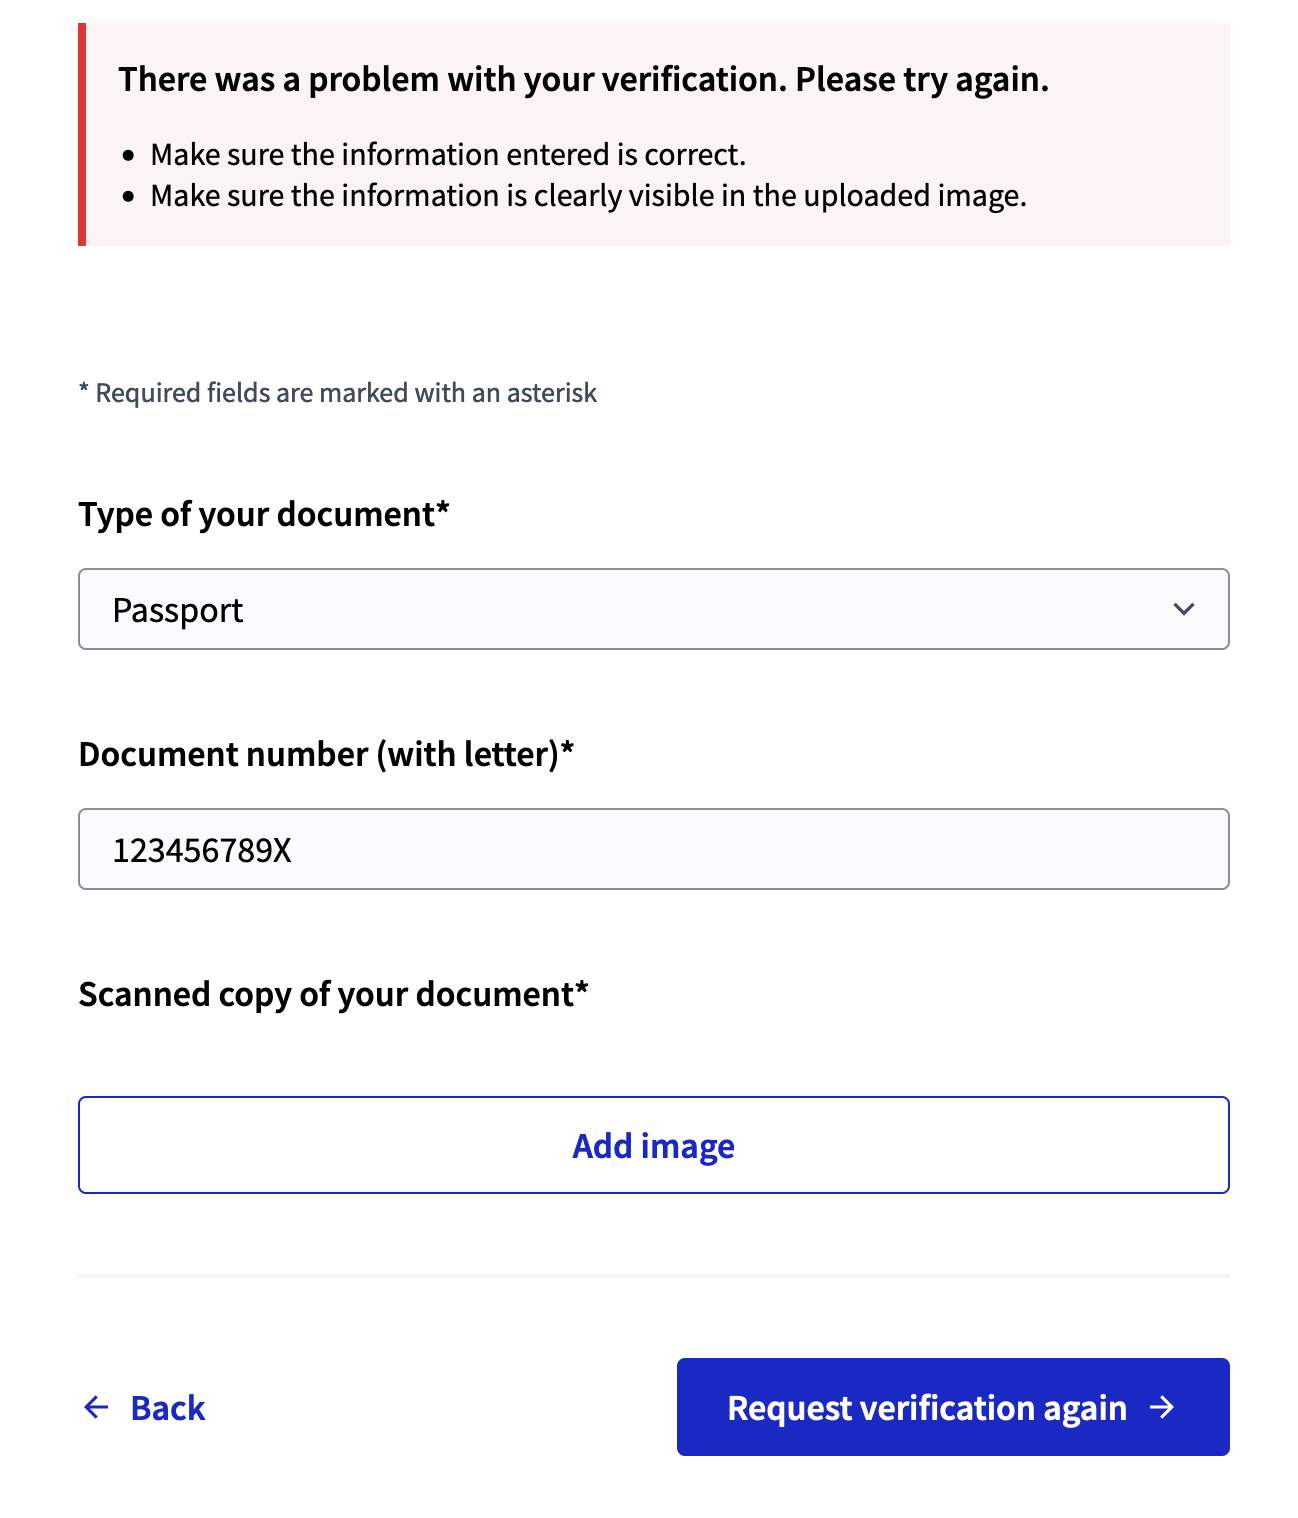
If the administrator can’t see the information or they can’t get it verified, they can reject the request and the user will be able to fix it.
1. Participant authorization creation
By going to the authorization section in its profile, or by clicking on the action button if this permission is requested, a participant can see the form for uploading a copy of their document. They also need to fill in their document type and number.
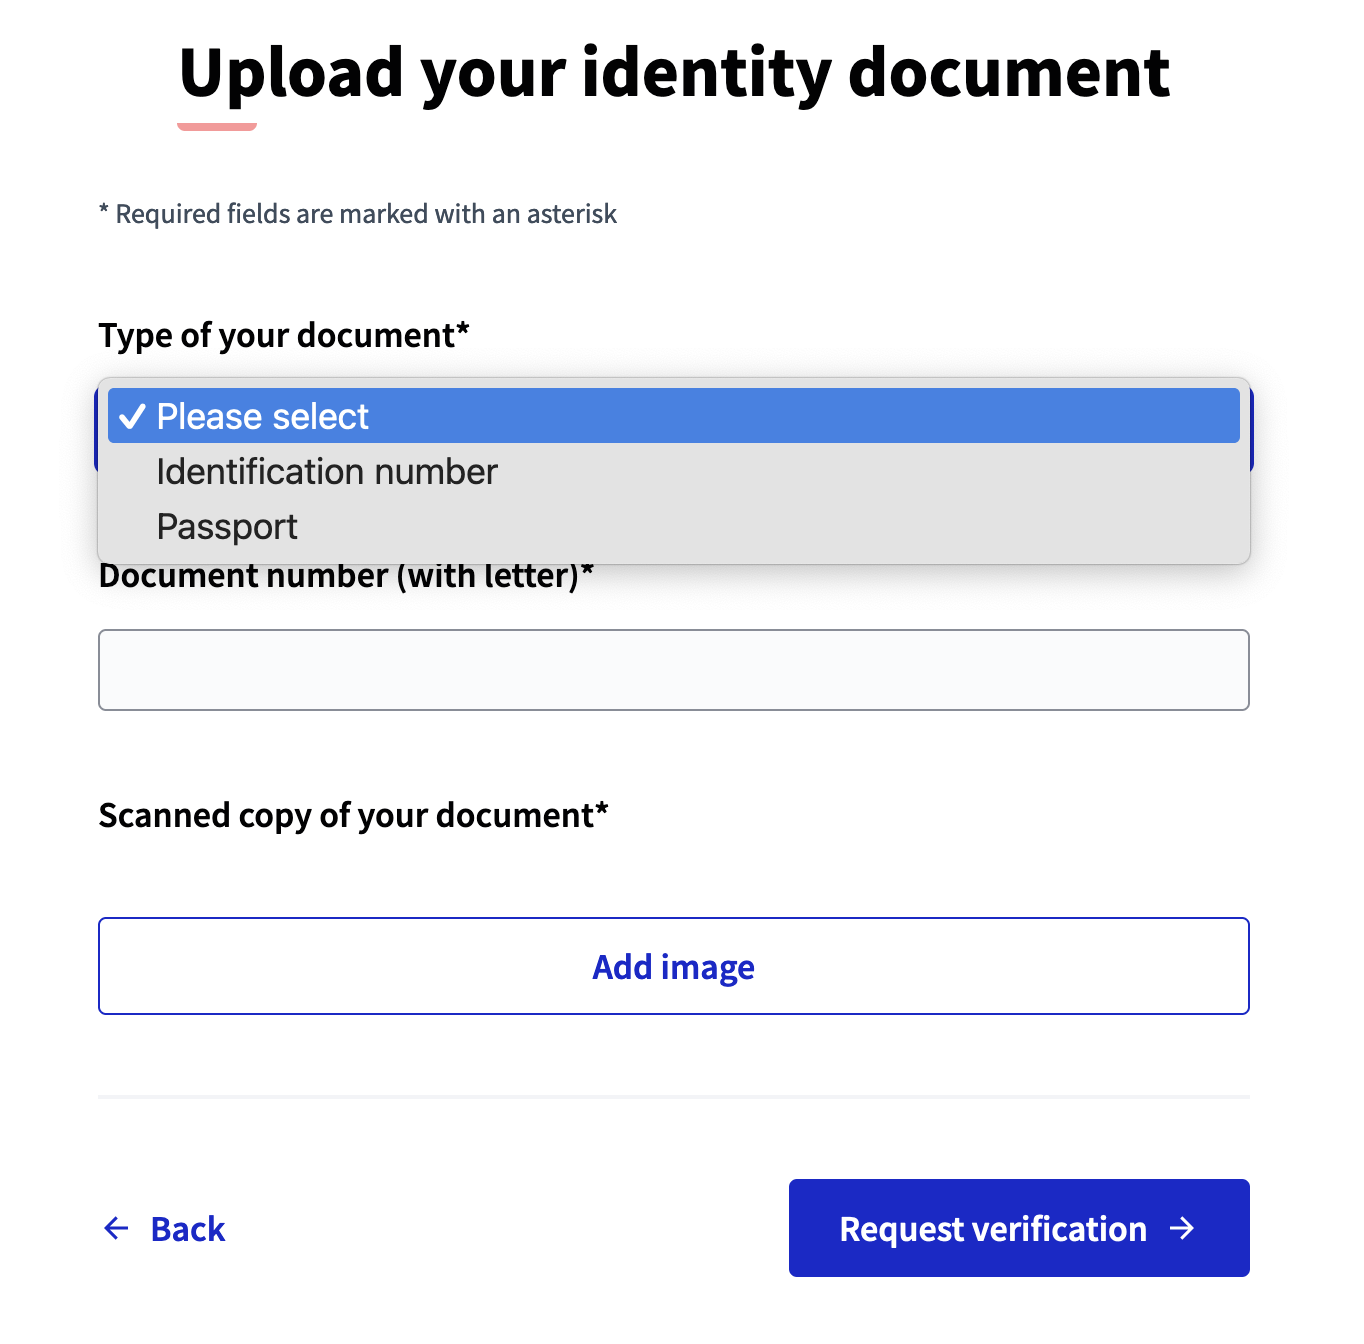
| You can change the document types options by customizing or overriding the code. |
2. Administrator document review
After this document is uploaded, an administrator can review it by going to the Identity documents section in the administration panel.

After clicking on the verification id link or on the document, the administrator needs to review the image and fill in the document number in the field. This number needs to match with the one provided by the participant.
3. Administrator decision
There are two actions an administrator can do:
-
Verify: the system checks if the document numbers entered by administrator and user are the same.
-
Reject: the participant have to edit their authorization if they want to get verified.
If the request is rejected then the participant can provide other pictures or document.
Once a participant is verified, their documents are deleted from the list.
Offline verification
The process is:
-
Participants fill in their document type and number.
-
Participants follow the instructions provided to them. For instance, if they need to go to a specific place in a specific time to show their documents.
-
An administrator go to the "Offline verification" panel and fills in the information present in the physical documents.
-
The information should match whatever the user filled in.
-
If the administrator can’t see the information or they can’t get it verified, they can reject the request and the user is then able to fix it.
For this authorization to work, an administrator need to first configure it in the administration panel with the instructions explaining what the participant need to do to finish the verification process.
1. Participant authorization creation
By going to the authorization section in its profile, or by clicking on the action button if this permission is requested, a participant can see the form for filling in their document type and number.
2. Administrator document review
In the administration panel, the administrator can review the request by clicking the "Offline verification" button.
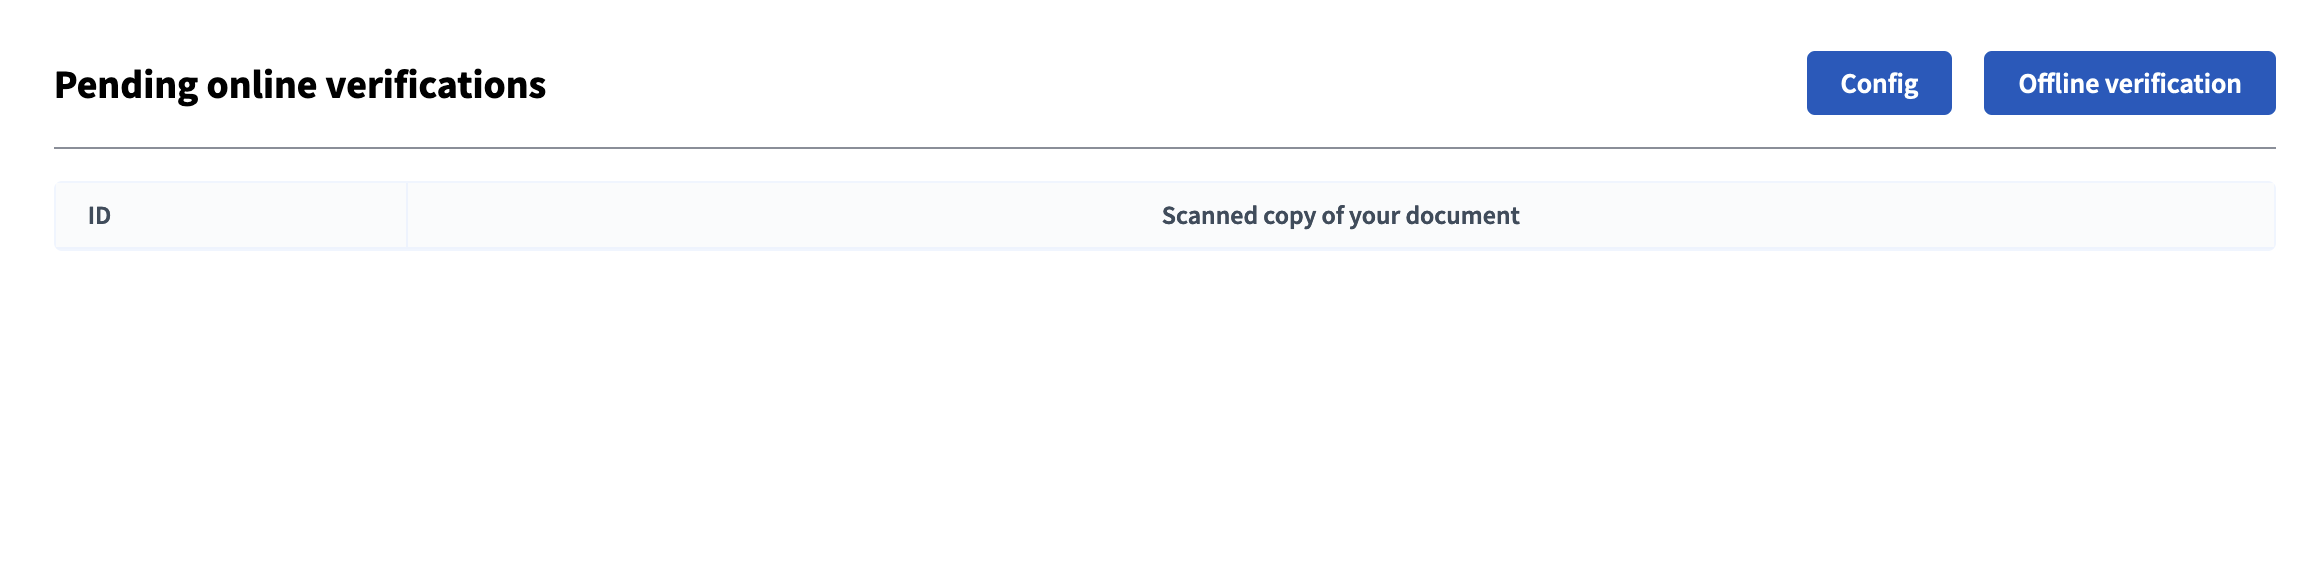
Then they need to fill some data provided by the participant and review the document physically provided.
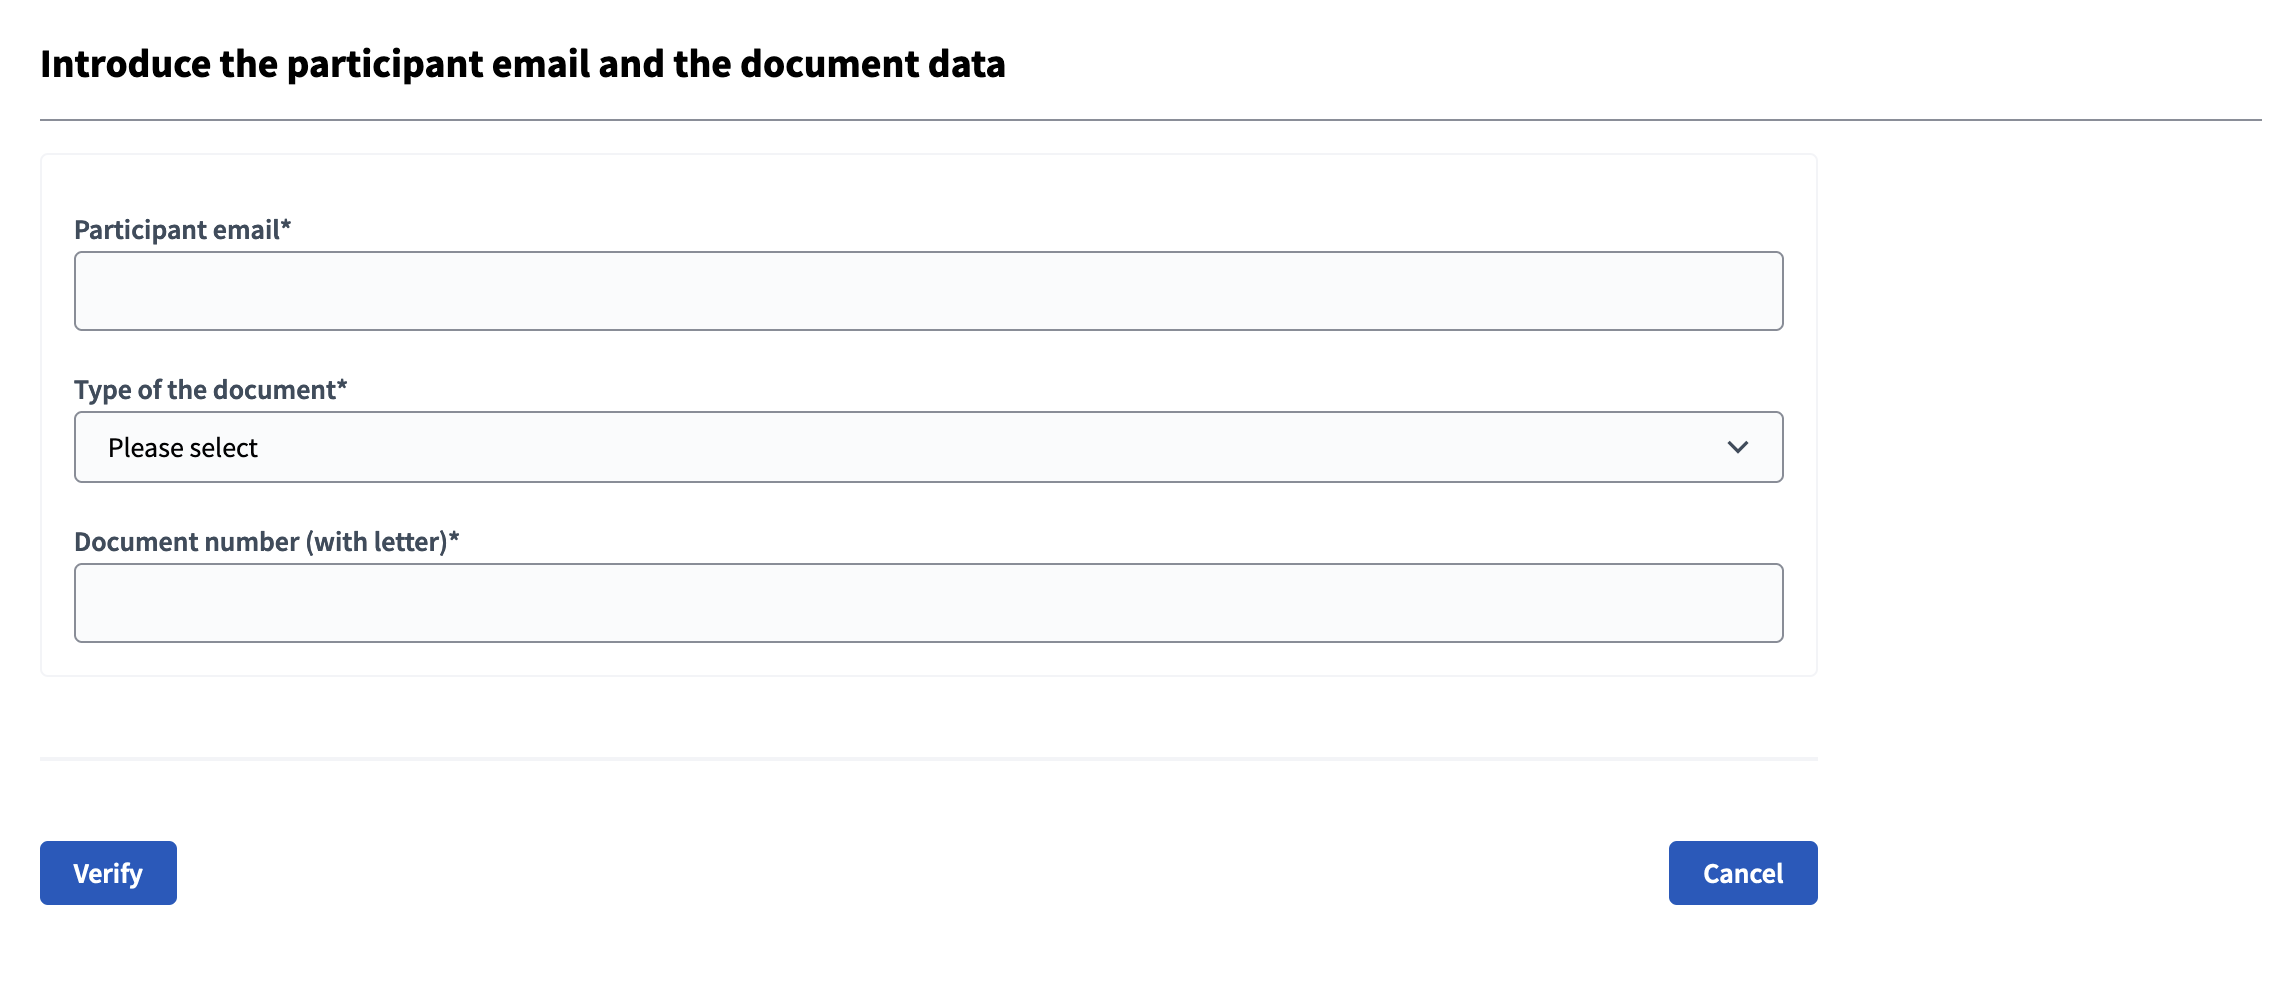
| Field | Type | Description |
|---|---|---|
Participant email |
Required |
Email of the registered participant |
Type of the document |
Required |
Can be: ID or Passport |
Document number |
Required |
Document number of the participant. For instance, "12345678Z" |